We do a lot of sharing in this day and age. Fortunately, not just cooties…amIright?
When we share Google Docs and Slides with our coworkers or students, there is always the gamble that they will make changes to our work. Sometimes those changes are ok, but frequently, we didn’t want them to make changes at all. Using revision history, we can always take our work back to where we left it, but there is an easier way to deal with this by preventing it from even happening in the first place.
With the magic of Google, you can share with people and FORCE them to make a copy. Instead of opening YOUR materials, they will be prompted to make their OWN copy, leaving your original work fully intact.
To do this look up at the top of your screen when you are working in Docs or Slides and notice how the url currently ends in edit. Simply move your cursor to the end of the url, click on and delete the word edit and replace it with copy. Then copy the entire URL and either email it, add it to a presentation, or share it in classroom. Whoever clicks on the link will now only be able to view the materials by making their own copy of it.
Here is a quick video so that you can see how this works!
I am going to let you all in on a little secret. You see, math and I…well, we just don’t have a very good relationship. In fact, you might say that we broke up a long time ago and have just never been able to reconcile. I am relatively certain math hates me, and believe me, the feeling is mutual.
Fortunately for me, in my recent years, I have come across a few teachers that not only love math, but are advocates for their subject and got me excited about the way they teach and the tools that they use. Anderson High School math teacher, Kristen Fouss (@fouss) and Trailblazer and Turpin High School math teacher Ben Schulcz (@BSchulcz) are masters of their crafts and both of them use edtech tools to reach all of their learners. If you want to learn about blended learning, using tech to differentiate, and dynamic classrooms full of FUN math (I can’t believe I just said that), then follow these people on Twitter!
In particular, Kristen introduced me to Desmos. Desmos bills itself as “the next generation of graphing calculator.” They also claim: “Desmos wants to help every student learn math and love learning math. But “every student” is a lot of students so we create digital math tools and let the Internet take them to anyone who wants them.” Wait a minute…love math? Like, for real and true? That is exactly what Desmos aims to do through their interactive activities that focus on math concepts like conics, expressions, functions, quadratics, inequalities and a bunch of other math stuff that I don’t understand.
Desmos has a library of activities that teachers can draw from for use in their own classrooms. Activities are easily shared out by creating a class code, and student responses are recorded for the teacher to view.
Here is an activity I assigned myself on Parabolas:
Yes, I know my math is wrong. I don’t even know what a Parabola even is. No matter though, because as I am working through this problem, my teacher sees this in her dashboard:
When I get stuck, my teacher can see where I am stuck and swoop in to save the day! Please, somebody, swoop in and save the day!
The activities are varied, fun, and truly explore the pedagogy and application of math. Desmos is not just limited to high school students. The platform is designed to be accessible to all learners and when you explore concepts and modules, the brains at Desmos have notes and postscripts that help you to identify which activities are appropriate for different grade levels or different types of learners. Lessons are marked as “Introduction,” “Development,” “Practice,” and “Application.” If you are unable to find an activity for your concept, you can even create your own using the Desmos tools.
Desmos has great teacher tools to help you, as an educator, understand the concepts and the best way to work through the activity by providing a teacher guide for each Desmos activity.
One exciting thing that you need to know about Desmos is that it is completely free! There are no hidden costs, no upcharges, and no desire to pinch your wallets since Desmos is paid for by partnerships with textbook companies and other organizations.
Another thing that you need to know is that the Desmos calculator runs seamlessly on any platform. You can add it as a Chrome app, an iOS app, or run it on your android. The calculator has also been chosen to be the calculator provided to Ohio students when they take the AIR test this school year (read the notice here), so the more exposure you can give your students to this amazing tool, the better!
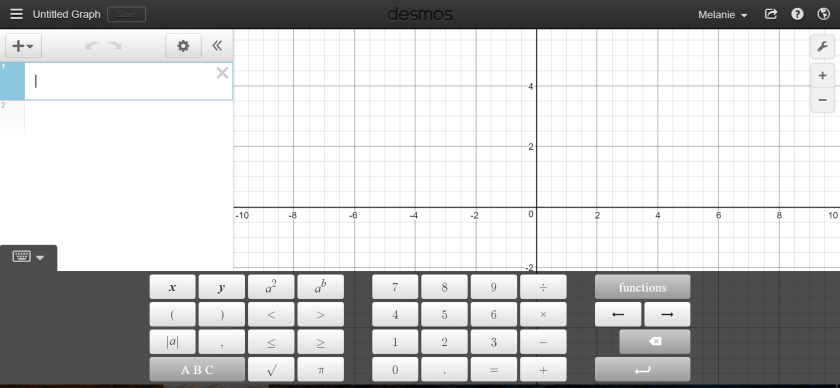
Desmos calculator as it appears in the Chrome app.
There is already a community built around Desmos, and if you do a Twitter search using Desmos as a keyword, you will see how math teachers all over America are implementing this tool in their classrooms. Why don’t you take the risk and join them! You won’t regret it!
As much as I love the collaborative tools in GSuite for Edu, sometimes they just don’t meet my needs when it comes to collaborative brainstorming, problem-solving, quick project sharing, or a place for students to have an online discussion about topics being covered in class. What tool can I use to create this sort of open sharing environment for my students? Why, Padlet, of course!
Have you ever attended a professional development class or meeting where there were large pieces of white paper on the wall and you were given sticky notes with which to go about the room and add your ideas or answer questions? Padlet is basically that, but better! This free program (with paid upgrades available) allows you to create an online bulletin/white board where people can collaborate, share ideas, contribute resources, and share digital materials like links, docs, and videos! Padlet can be as private or as public as you want, and users can access your Padlet from a Chromebook, computer, phone, or tablet. As long as they have access to the internet, they have access to your Padlet. Students will not have to create an account so Padlets can be quickly and easily accessed and used without disrupting the flow of your class. And for that teacher in you that just wants everything to look “pretty” or “cute,” Padlet has beautiful and fun backgrounds to keep your collaborative space from being too plain.
Want to see it in action? Check out my Padlet and add your ideas about how you would rule the world!
Now that you can see it in action, just think of the possibilities! Here are a few of the ideas I came up with:
Bell ringer activity – ask a question to get the kids accessing prior knowledge or preparing their brains for learning new content
Brainstorming – instead of writing out all of the students’ ideas by hand on your whiteboard or poster paper, have them add their own ideas to your Padlet
Question/Answer – create a problem and have students share their answers here. This would be especially useful in a math classroom. Have students post their answers and explain their thinking
Group work – have students working in groups create their own Padlets to share their resources with each other. Or, create a class Padlet and have students share resources with their classmates across periods/bells
Exit Ticket – what did your students learn today and how will you expand on it for your next lesson?
Hypothesis and Results – make your science lab an open forum and let the students share their thinking before and after the lab along with their results
Guided research – create a Padlet with all of the links and materials you want your students to use for a project
Primary Source – sometimes primary sources are difficult to find, but you could curate a collection of them by providing links to them on a Padlet
Book Talks – instead of book reports, students can share a picture of their book and a quick explanation of why others should read it
These are just a few quick suggestions to get your brain thinking. If you do a quick Google or Twitter search, you will see that the possibilities are endless!
To get started with Padlet, simply go to www.padlet.com and sign up for an account. I recommend that all new users check out the Padlet Tour when they begin. Of course, I am here to guide you through and if you would rather have some personal training, just let me know!
I wanted to make sure that you are aware of one of the most powerful extensions out there for Google Classroom users – Share to Classroom.
The Share to Classroom extension allows you to take a web source and share it with your students in one of two ways:
Immediately push the source to all students at the same time, allowing every student in your class to navigate to the source without having to type in the URL.
Create an assignment, make an announcement or ask a question with the web source as your primary component.
The reason that I like “Share to Classroom” so much is that it allows me to use current materials with my students with minimal effort. Let’s say I want to discuss the current hurricane and how it is affecting the people in its path. I can go directly to a news source (no fake news here) or a site like weather.com or nationalgeographic.com and find news articles, images, or video that I want my students to use. Then, using the “Share to Classroom” extension, I can create an assignment where students have to interact with the materials and then create a disaster plan, write a personal connection paper, or design a social action plan where they define ways that they will help those affected by the storm.
Another way that I see a benefit in “Share to Classroom” is the ability to get every single one of my students onto the same resource at the same time. When I PUSH the web source or video to the students, it interrupts whatever they happen to be doing at that time and opens up the material I want them working with.
To make the extension work they way it is intended, students and teachers must have it installed. Fortunately for Lebanon City Schools teachers, our awesome tech department has already pushed out the extension to the students. You as teachers will need to install the extension. If you don’t know how to do that, click on this link and click the “Add to Chrome” button.
To use this extension, follow these easy steps themselves:
Make sure you are already signed in with your G Suite for Edu account.
In Chrome, go to the webpage you want to share. Next to the address bar, click Share to Classroom.
Click the name of your class.
From the drop-down list, choose what you want to do:
To share the webpage to your class, Select Push to students and then click Push. The web material instantly appears in the browsers of all active students.
To attach the web material to a post:
To create an assignment, select Create assignment, enter your assignment, and click Assign.
To ask a question, select Ask question, enter your question, and click Ask.
To create an announcement, select Make announcement, enter your announcement, and click Post.
Just imagine all the possibilities that this extension opens up for you and your students! And I didn’t even mention the ability of students to share materials with you! More on that at a later day.