Does your Google Drive or your GMAIL feel like a giant black hole where you can never find what you are looking for? Have you ever wondered how to make the most of your internet searches? Check out this week’s Tech Tuesday which is all about how to be a Savvy Searcher in your Drive, GMAIL, and online. Learn tips and tricks that will have you digging for gold, er, your materials, and actually finding them!
One of the ways we have been able to support students with little effort on our part is by teaching them how to use Immersive Reader, an app that students could use to have online content read to them. It had some kinks to it, especially with how it didn’t work well with Google stuff, but it was our only option.
However, it no longer works with Google Chrome and so we have had to pivot. And this pivot has actually turned out to be wonderful and much more useful for students.
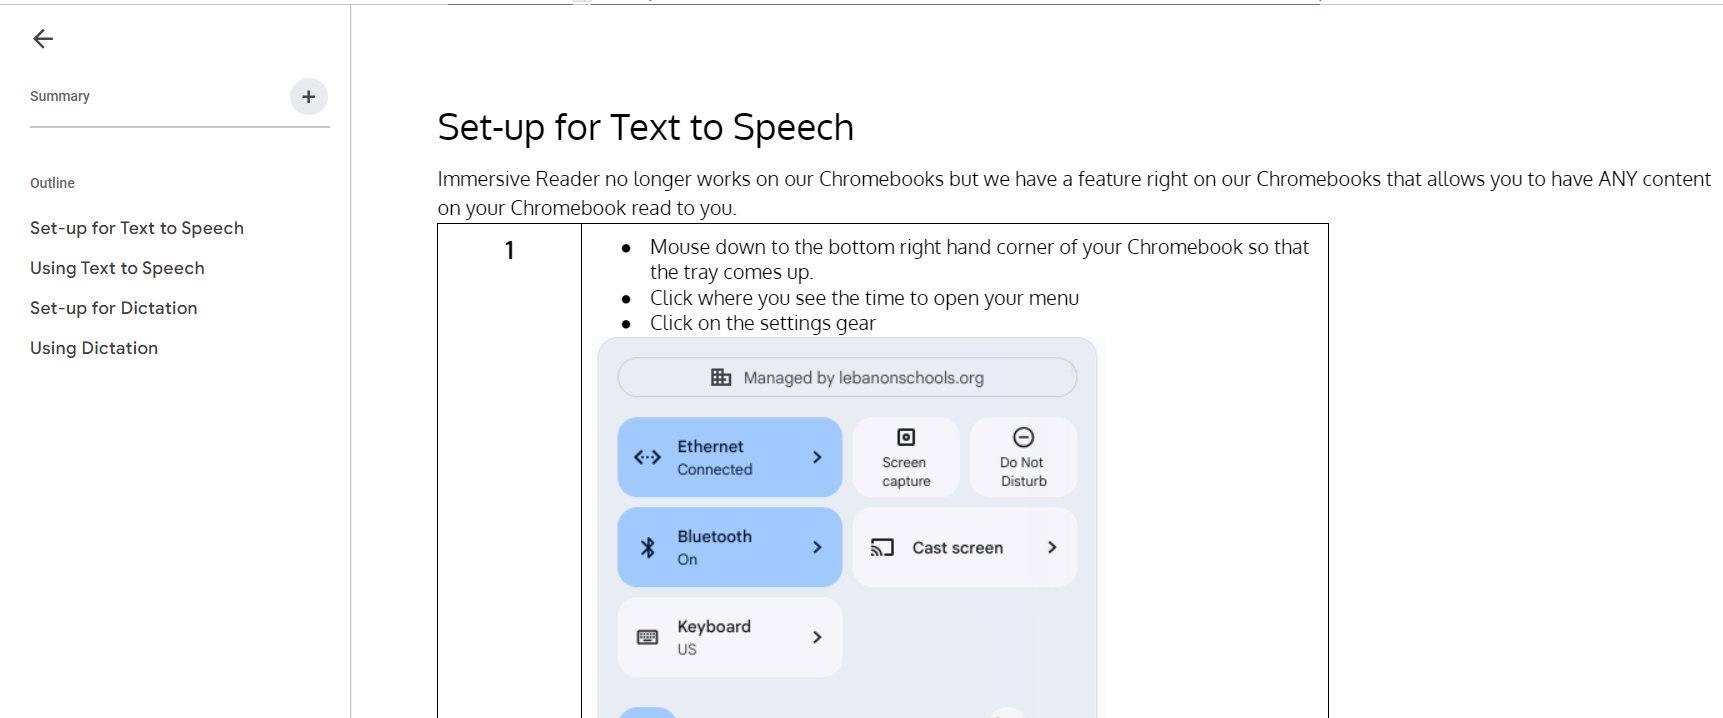
On their Chromebooks, students have accessibility tools that open up learning opportunities for all students regardless of their reading or writing abilities. Their Chromebook has a speech to text feature that will read ANYTHING on their screen to them. They also have access to a dictation tool that will allow them to voice type anywhere there is a text field, even on Google Slides and Google Forms!
Chromebook Accessibility Tools in Action
These tools are crucial for the success of some of our students so I am counting on you to get the word out. I have created materials for you to share with the students. These materials are set so that you can place them in Google Classroom or show them to your students in class. This is especially important for our junior high and high school students that are desperately trying to hide their need for accommodations.
Show students how to set up and use the Text to Speech Feature
Show students how to set up and use the dictation tool
Step-by-step Written Guide with Visuals for both Features (Expand the document outline on the left to access the table of contents)
Are you a to-do list maker? Do you scribble down all of the things you need to do on whatever random piece of paper you find on your desk? Are you always searching for just the right way to keep track of your tasks? Have you ever had an “oh, &*@$!” moment because you forgot to do something that really needed to be done? Or, are you looking for a way to get your students to embrace organizational techniques that will help them get their work done?
If any of these describe you, then do I have the solution you have been looking for! Google recently updated their TASK feature (embedded in Google Calendar) and made it an amazingly easy tool to use. It is now more robust, accessible in multiple ways, convenient and can help you make sure that you are in control of your tasks. In fact, it will make you the MASTER OF TASKS!
To learn how to be a master of tasks, check out this tutorial I created for the teachers in my district. Once you have mastered your tasks, make sure you teach your students to do the same!
While this feature is still in beta mode, you can now add interactive questions to YouTube videos that are attached to Classroom assignments. Watch my video to learn more about this great new feature.
I am super hyped about the new feature in Google Docs that allows you to create and save your own templates that can then easily be accessed by typing the @ sign followed by the name of your template. I think this new tool will really streamline a lot of my work and the work of other teachers.
Here is a video I created that will give you a quick overview of what building blocks are and how I think you can use them.
There are so many ways I can envision using building blocks:
Any activity or report that you recreate every week by making a copy of the doc you used last time and use by deleting the content you added the last time you used it.
Student reading logs – Use a table. In one column, create a dropdown of genres. In another column, have a dropdown for the number of minutes read. In another column, create a dropdown of emoji reactions for the book.
Group project assignments – Create a template for group projects using the product roadmap as the basis. There is a column on there for status and a spot for related files. Make the template and use smart chips to attach materials students will need to access for the project. Create an assignment in Google Classroom where you assign one page per small group with the “everyone can access” option. Students in the group will then work on the same document and you can track their progress with the progress dropdown. They will submit just one paper for you when they are done with the assignment.
Lab work – Similar to above, create a template for lab partners. You can use the product roadmap as a basis and insert directions, material, and spreadsheets for students to be able to record their data.
Newspaper, magazine or encyclopedia articles – Create a template that you want students to use that mimics any of those types of writing. Leave places for images, create columns, titles and leave spaces for headings. Assign in Google Classroom.
Lesson Plans – Create plans with columns and dropdown menus that have standards or units in them. If you are working with other teachers to create these templates, you can use smart chips to assign responsibilities for each section.
This is just the tip of the iceberg! I am sure you have a lot of ideas on how you could use Building Blocks in Docs, but you probably need to know how to get started with building blocks in the first place. You can use my start up and resource guide to get yourself going.
What will you use Building Blocks for? Leave your ideas in the comments.
If you are looking for additional resources or tutorials on everything Google, feel free to check out the PD website I created for my teachers so that they can get just in time training on all things edtech.
Many of the teachers in my district have not been shutting down their computers at night because they don’t want to have to reopen all of the tabs they use every day. Tabs like their morning message slide, email, and our student information system used for attendance. Not shutting down a computer every night is a breach of security. With your computer open and logged in, any person who comes into your room has access to information that should be secured. Not shutting down a computer every night also keeps it from catching the updates that will help it run smoothly. To help teachers feel comfortable shutting down each night, I created this video for them showing that they can create a bookmark folder of all of the materials they need to open each day. Once they create this folder, they can simply right click on it to open all of their teaching materials with one click of a button. I hope this helps you as well!
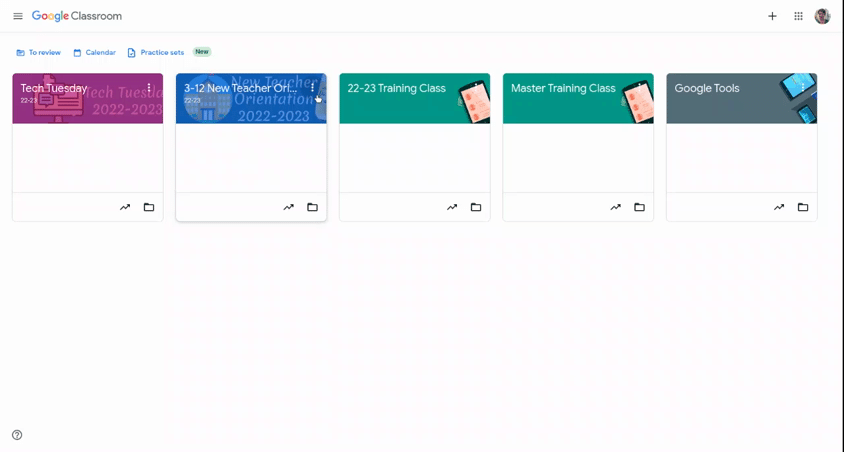
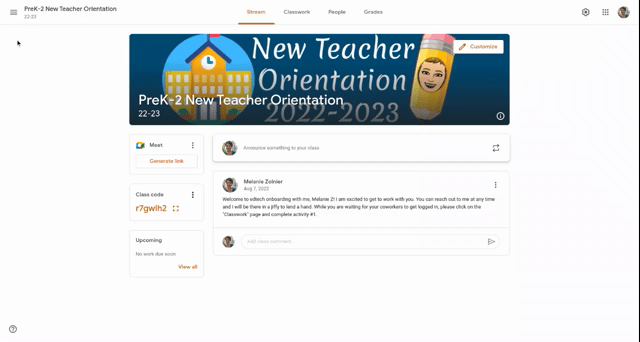
In the past, I have always recommended that you make a copy of your Google Classroom so that you have a clean copy to use with your students for next year. However, what I have begun to see for those of you that have very material and video heavy Google Classrooms is that the new copy you have created is missing materials or seems to get caught in a loop where your videos never process correctly or attachments are gone. I have done some research on this issue and can’t find a really good solution within Google, so I am suggesting that you take the following steps and create what is considered a “Master Classroom.” This master classroom will contain all of your content, in descending (whatever you assigned last will be at the top) order, but will be a repository that you can use to assign (by using the “reuse assignment” option) into a new Classroom. That way, all of your original content is still there, you can see what order you assigned it, but you don’t have that terrible moment where you and your students discover that the content you thought was in your Classroom really isn’t there.
To create your new “Master Classroom”:
Return all student work
Remove students from the Google Classroom
Rename your Classroom to “Master Classroom” or whatever other moniker helps you remember what you are going to use it for.
At the beginning of the next school year, create a “NEW” classroom and use the “Reuse assignment” option to pull the content from your “master classroom” into the new classroom. This way, it will create an assignment or material that you can give a current due date to your students.
Your new master class is going to work as that old fashioned plan book that we used to write every single lesson into! You can now scroll through topics and assignments that you have used in the past and reuse them in your new Google Classroom. The benefit of this is that in your master classroom, all of the assignments, materials and topics are already published because you used them in the past. When you reuse them in your new Classroom, it puts them back into draft form, allows you to edit or add new materials, and assign new due dates to your new students. To reuse a post:
Open your new Google Classroom
Click on Classwork
Click + Create
Click Reuse post
Select your master class from the list
Find the assignment of material, click on it and click “Reuse” in the bottom right
DO NOT SELECT “Create new copies of all attachments” because it will make a mess in your Drive
Your assignment or material is now in draft mode. You can add new directions and materials or remove old content you do not wish to use. You can give a new due date or schedule the assignment. You can add plagiarism checking, assign to individual students, or just leave the assignment/material in draft mode for when you are ready to to use it.
To see how to use the reuse option, watch this short video (no sound).
As you are wrapping up the school year, there are a few housekeeping items that you should attend to when it comes to your Google Classroom.
The best procedure to close out your year is to: 1. Return all student work 2. Make a copy of your Classroom if you would like to reuse it next year 3. Archive your current Classroom
If your Google Classroom is not content heavy and you want to be able to use it again next year with your students, you should make a copy of the Classroom so that all materials go back into draft form so your new students will not be confused by materials that you used with previous students. Simply deleting this year’s students from a Google Classroom and reusing it with new students actually creates more work for you in the long run since all materials are already published, are assigned with due dates, and have student work associated with them. When you create a new copy of your current Google Classroom, you are setting up a clean environment that still has your materials, just in draft form that can be published when you are ready. When you archive your old Google Classroom, your previous students will still find all of their assignments and materials in their Google Drives and will still see an archived version of the course if they dig deep into the Classroom menu, but the Classroom will be view only and students will not be able to change or edit anything in the Classroom itself.
When you make a copy of your Google Classroom, all content on the Classwork section of Classroom is automatically put into draft mode. You will then be able to go in and publish each item as you are ready to use it. Even better is that before you publish it for students, you can edit the assignment or material to update it for the current year. It really is a win-win situation. The only problem with making a copy of a current Class is that only the content on the Classwork page is copied. Materials on the Stream will not copy.
Follow the steps below to wrap up your Google Classroom for the year.
Return all work: You want to return all student work so that Google moves it from your drive to their drive. Otherwise, you will be wading through student work in your Drive until the end of time. The fastest way to return student work is to:
Open a specific Classroom
Click on the Grades link from the menu on top
Click on the three dots to the right of each assignment name
Select “Return All”
Click “Return”
Move to the next assignment and repeat
Make a copy: If you want to reuse the same class for next year (see above to understand why it is better to start with a fresh class rather than delete students from the current class) or you want a copy of your class for reference:
Go to classroom.google.com
Click on the three dots on the right of the Class tile that you want to copy
Select “Copy”
If your Class has a lot of content, it can take some time to make a copy. You will receive an email from Classroom once your copy has been made.
Archive the Class: Clean up your Classroom view by archiving your Class. Don’t worry! You still have access to the archived class and can pull content directly from that class into a new class with just a few clicks of a button. To reuse archived content,
Go to classroom.gooogle.com
Click on the three dots on the right of tile of the class to be archived
Select “Archive”
Don’t forget that you can always reuse materials from archived Classrooms. Just because they aren’t viewable on your current dashboard doesn’t mean that they are gone forever!
If you have a content heavy Google Classroom, you might discover that making a copy leaves you with missing content and videos. If that is the case, try my suggestion for making a “Master Google Classroom” from this post.
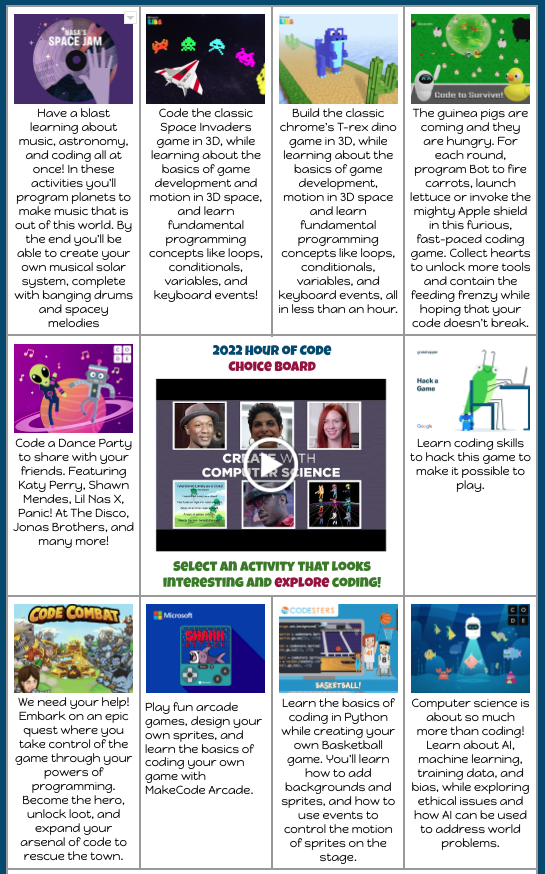
December is upon up and that means that it is time for the 2022 Hour of Code! If you are interested in learning more, check out the Hour of Code website. You might be interested in giving your students a chance to try it out but a little overwhelmed by the options. If that is the case, feel free to use my Hour of Code choice board. I went through and selected activities that students can complete without assistance. I would recommend that you use this particular choice board with kids in fourth grade and up. The easiest way to use it is to make a copy for yourself and then share it as a material in Google Classroom. If you do not use Google Classroom, you can share my bit.ly with the students by writing it on the board or putting it in your LMS or on Clever. bit.ly/HofC2022.