Posted in Blended Learning, Teacher Feature

Teacher Feature – Beth Mele and offering students voice and choice in a blended learning environment

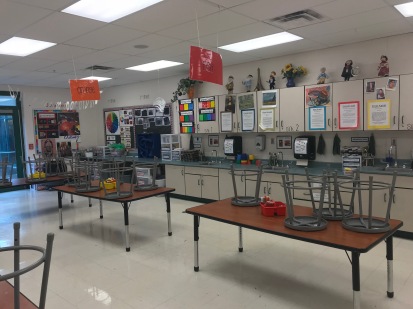
I am a frequent visitor to Bowman Primary School (in Lebanon, Ohio for those of you that aren’t local), and every time I pass by the art room, I find myself stopping just to enjoy a few moments of the scene in front of me. Students are all engaged in their work, awesome products are being created and crafted, and everything is running like a well-oiled machine. Beth Mele, the art teacher at Bowman, has created an impressive blended learning environment for her students by utilizing six classroom iPads and some Google tools. The way she teaches her subject is truly an art and the techniques that she uses can be easily lifted and recreated in any other subject area.

empty art classroom
The Calm Before the Storm!

Blended Learning is an educational pedagogy that combines traditional teacher-led instruction with a digital component that gives students some control over time, place, path or pace. In order to provide an integrated learning experience, what happens in the classroom informs the activities or materials that live in a digital space and vice versa. Some popular methods of blended learning include flipped classrooms and rotation models. (For more on blended learning, visit this resource from the Christensen Institute.)

The big question is, how did an art teacher, who serves – with limited technology – about 200 grade 1-2 students a day create a blended environment for her students? Well, read on to find out!

On the morning that I arrived, Beth told me that she had just introduced the students to collage making the day before. She explained that the way she runs her classroom is that she uses the concept of studios. Once she has introduced her students to a specific technique, it now becomes an option for them to choose from to create a project using any of the techniques that they have already learned. By the time I visited in mid-October, she had introduced four different art techniques to her students with plans to begin fiber techniques next week.

picture of studio options: drawing, collage, painting, sculpture
Students can select from any of the open studios during their class time.

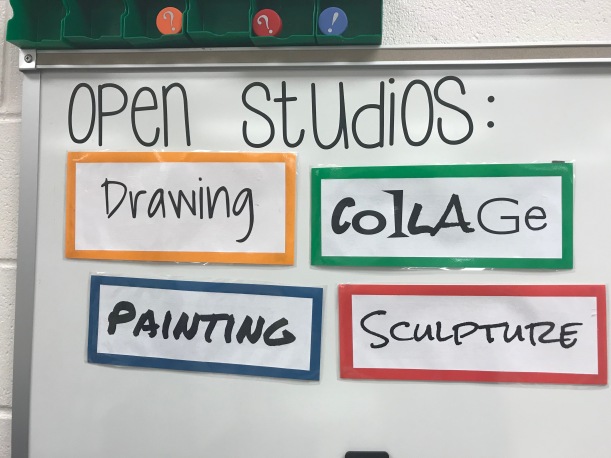
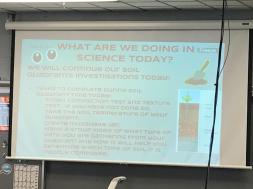
Beth said that she felt a few of the students needed to see the technique again, so she was going to start the day with a mini-lesson review of how to create a collage. Using her document camera, she quickly modeled for the students how to cut and arrange paper to create a scene and then told them to go ahead and get started on a project of their choosing. With zero fuss and surprisingly little chaos, all of the students immediately got to work. The beauty of it all was that each kid was working on a project of their choosing at their own pace! As I circulated around the room, I saw students painting, drawing, sculpting and making collages.

students creating sculpturesstudents drawing

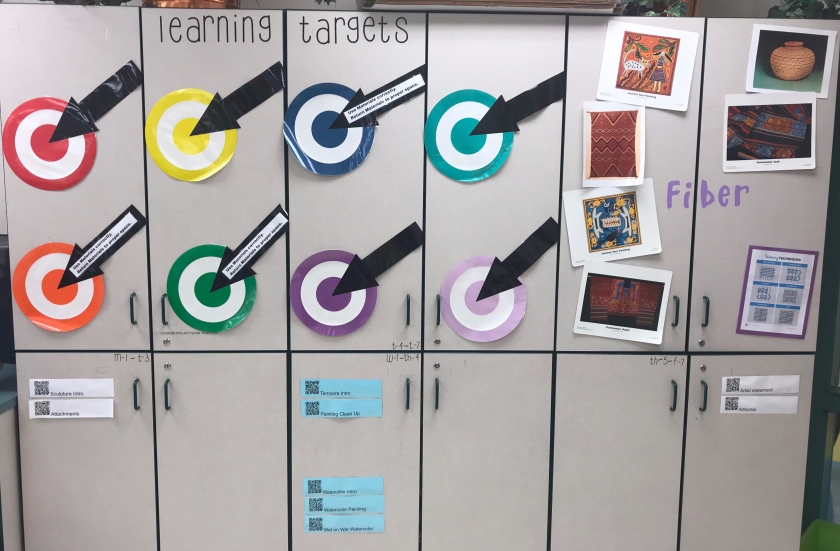
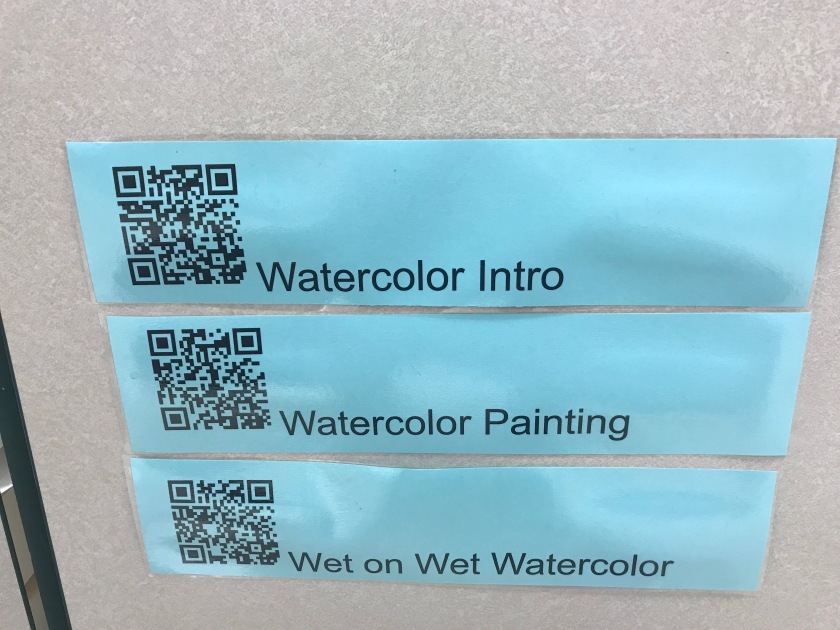
What turns this classroom into a blended one is the way that Beth has created accessibility to skill videos for the students. Scattered around the room are QR codes. When a student needs to learn or revisit a technique, they simply grab one of the six classroom iPads and scan a QR code. It brings them to an instructional video created by Beth. Students have the ability to watch, pause and then rewatch short videos for the chosen skill. This allows them to move at their own pace, and since they can select any of the projects that are listed in the open studios, they are given voice and choice. Beth has created a learning targets wall where the QR codes can be found by all students. One of the most beneficial parts of this is that by creating these instructional videos, she has freed herself to work with students on a more individual basis. Instead of answering the same question over and over again, she can redirect them to the appropriate QR code and free herself to work one-on-one with those students that need it.

bulls eyes and qr codes on a wall.
QR codes can be found aligned with the learning targets for the unit.
QR Codes for watercolor technique
Students can scan any of these QR codes to watch a tutorial video. Try it yourself!

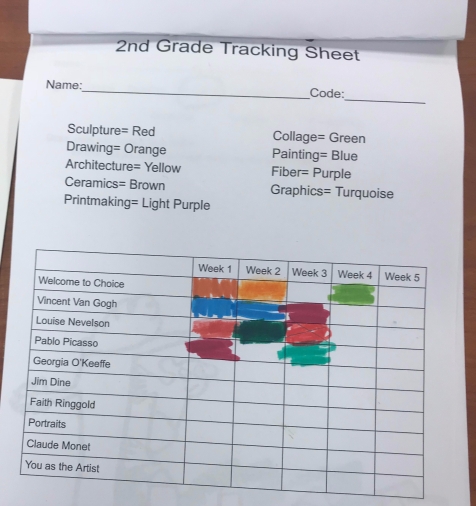
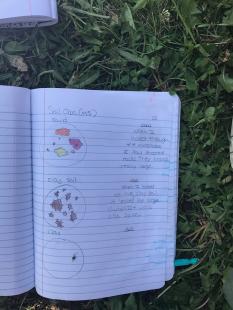
To make sure that students are getting ample practice with each skill, Beth has created a way for the student to chart their progress. Each student has a tracking sheet where they simply color in the cart with the color of the technique that was used. At a glance, Beth is able to quickly see if a student is on track, if they have only focused on one task and need to expand their skill set, or if they aren’t keeping an appropriate pace for learning.

graph showing weeks, artists and technique
Students track their work and practice from each technique

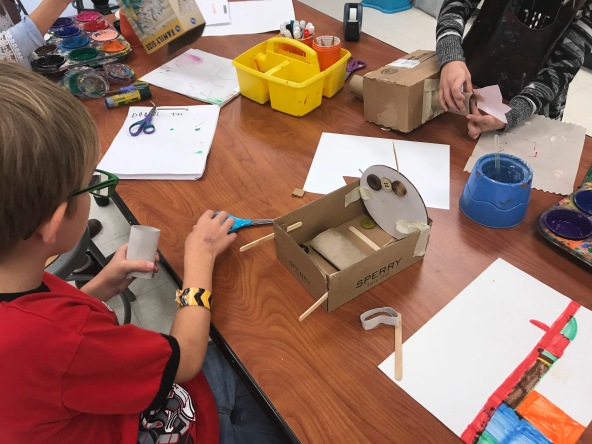
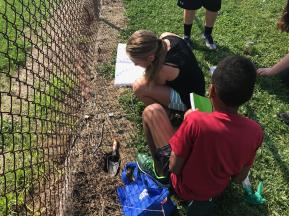
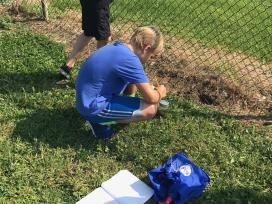
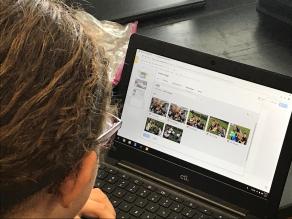
To showcase (or prove) that they have grown and learned each skill, students are required to write an artist’s statement on each completed piece. They are then given the chance to upload their completed work to a website called Artsonia. Artsonia is an online portal where teachers and schools can curate student work in a museum-style setting. By using Artsonia, Beth has given her students a platform or stage to share their work with the world (or just their families…guess I got a little ahead of myself.) Look at this photo story of one of my little friends. He is taking his sculpture to completion, writing his artist’s statement and uploading it to Artsonia for his parents to view.

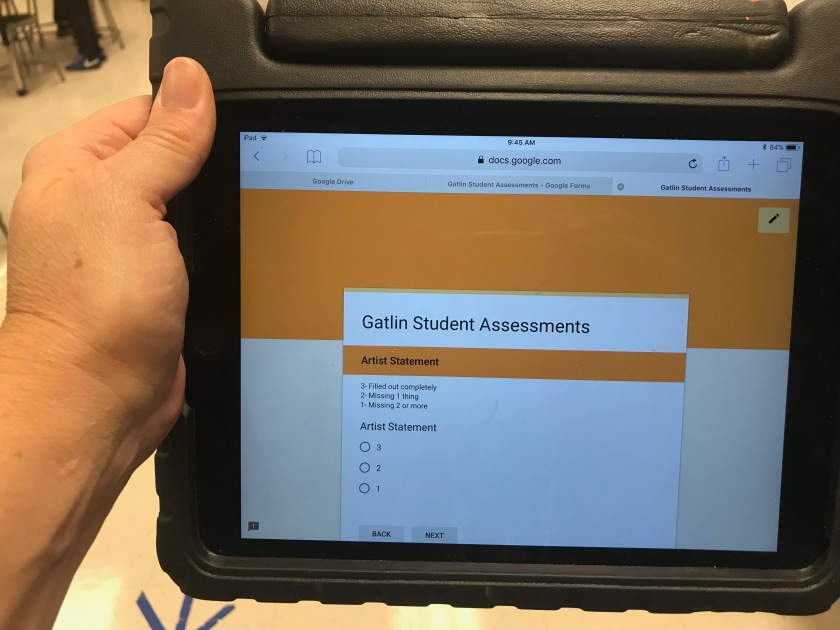
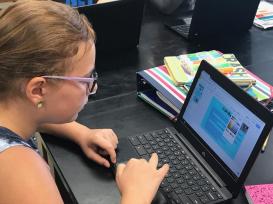
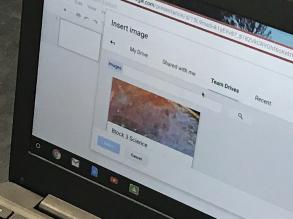
Since Beth sees 200 hundred students a day, she felt that it was important to be able to quickly monitor student work in a digital format. To do this, she has created a Google Form that she uses on her iPad. It allows her to circulate through the room, stopping at random students, and collecting data on how they are doing in her class on any given day. She has even set up her Form so that she can take a picture of their work and upload it through the Form. While this helps make report card time easier, it also helps her make sure she is meeting the needs of each student since she can see her data in spreadsheet view.

Google Form on iPad
Beth is quickly able to spot check and assess student progress.

I cannot stress enough how wonderful my experience in Beth’s art classroom was. She has created a well-oiled machine. Students are able to work on projects that inspire and excite them and by using technology she is freed up to meet her students where they are. She does all this with a document camera and six classroom iPads. Beth uses an iPad to record her videos and then either places them directly on Youtube or right into her Google Drive for easy sharing. Her students know exactly what is expected of them, and she has even figured out a way to make clean-up a breeze. Beth has an old iPod sitting near her desk that she has programmed with musical alarms to go off about 5 minutes before the end of the class period. Students hear that music and they know it is time to clean-up! No more of that frantic rush to put things away once somebody notices that the time has come to an end.

Now, just imagine if you took her techniques and put them in your own classroom? Tricky math problems? Lab instructions? Repeating the same grammar instructions over and over again? Try creating short tutorial videos (or finding them in places like Khan Academy), create a QR code and place it either in your classroom or on their actual papers and see how much more independent they become! Every technique that Beth uses can be something you use in your own classroom. There are even websites like Artsonia that allow students to share their work outside of the four walls of your classroom. (Seesaw and Class Dojo are names you are probably most familiar with.) If you ever get a chance to watch Beth Mele in action, I highly recommend you do. Her classroom feels like a magical place and the kids don’t even realize they are learning!


Posted in Cool Tools

BrainPOP Will Blow Your Mind!

When I was still in the classroom, BrainPOP was a great resource for me to be able to show a short video illustrating a concept. The kids loved it, but to be honest, I used it more as a reward or to fill up free time than as an actual teaching tool. I kind of drifted away from BrainPOP and hadn’t really explored it all until just last week when somebody said to me, “Hey, have you seen all of the cool things that BrainPOP can do?” Intrigued, I signed in using my district G-suite for Education credentials and my mind was blown at the amazing lessons, student response options, and concept packaging that is available.  

If you haven’t checked out BrainPOP in awhile, I highly recommend that you give it a second glance, especially since the district has provided each teacher and student with a full subscription!

Features:

G-Suite Sign In:  No need to remember usernames and passwords. G-Suite Login ScreenTeachers and students can simply sign into BrainPOP with their G-Suite credentials. A click quick and you are in!


My Classes/Google Classroom Integration: BrainPOP allows you to sync your current Google Classrooms with their system. This sync will pull your Classroom roster and make it easy for you to see individual student progress on any assignments you create within BrainPOP. The My Classes tab shows detailed progress for each student. You can view where they currently are on an assignment, how they have done on any of the items already completed and interact with student work in spreadsheet form. If you want, you can download scores and progress records as an Excel file (don’t worry, you can turn it into a Google Sheet once you upload it to your Google Drive).

Assignment Builder: Instead of just giving your students one video clip to watch, you can create an entire package of learning opportunities. Each video clip has predesigned activities. If you want your students to explore a concept and then apply it, simply select from any (or all) of the activities and have BrainPOP package and deliver them. You can then use the My Classes tab to monitor success and struggles. Assignment Builder

Quiz Mixer

Movie Quiz/Mixer Quiz/Quiz Builder: Each BrainPOP movie comes with a movie quiz, but you also have the ability to create your own quiz. When you use the Mixer tool, you can write your own quiz questions or choose from a bank of questions already written. 

Make-a-Map: Take concept mapping to new heights with this tool. Students can make meaningful connections as they create graphics based on the video concepts by using BrainPOP images, keywords, and movie clips.

Make-a-Movie: Students and teachers love the concept of movie cremake a movieation. Usually, we are searching for tools that students can use to create their own movie, and now you don’t have to look any further than BrainPOP. This extremely robust tool allows not just students to create, teachers can create as well! Click on the image to see some videos created by BrainPOP users!

Creative Coding: Have you been thinking about offering coding opportunities in your classroom? BrainPOP has decided to capitalize on this new focus on coding and STEAM opportunities by developing their own in-house coding activities! Don’t know how to code? Don’t worry, all the resources you and your students need are right at your fingertips!

BrainPOP Challenge: BrainPOP’s auto-graded Challenge feature now accompanies more than 100 topics, from Edgar Allen Poe and Plate Tectonics to Copernicus and Stocks & Shares!  These playful activities challenge students to put their critical thinking skills to the test in fun, interactive ways while seamlessly enabling teachers to assess what their class knows. Each BrainPOP Challenge is a set of topical activities emphasizing cognitive skills including concept mapping, diagram labeling, matching, text highlighting, multiple response, sequencing, and Venn diagramming. Source

Games: So many games! So many fun concepts! So many linked lesson ideas! What a great way to help make learning fun. These aren’t just games for students to waste time on; they are directly linked to content and standards. Each game even has an aligned lesson plan to extend the learning beyond the game situation. Students can create their own games as well!

Newsela: BrainPOP has taken the work out of finding resources for you by including Newsela articles right in the assignment builder.

FYI: Need your students to dig a little deeper? Assign an FYI sheet as part of student work. The FYI link provides vocabulary, quirky information, real-life examples, and possibly even a comic strip!

FYI

Teacher Resources: BrainPOP is not expecting teachers to just create assignments and have the students experience the concepts only in a digital environment. Every concept in BrainPOP includes lesson ideas, printable resources, and additional ways to explore in the classroom with teacher-led instruction or activities.

What are you waiting for?

I am just amazed at all of the resources you have right at your fingertips! And before you decide that BrainPOP isn’t right for the age of your students, know that you can toggle back and forth between BrainPOP and BrainPOP Jr. With the combined forces of these programs, any teacher from Pre-K to 12th grade should be able to find materials for their students!

If you are interested in getting started with BrainPOP and like to learn on your own, check out the beginner’s guide at https://educators.brainpop.com/.

If you are interested but would like to have a little one-on-one coaching, feel free to contact me and schedule a collaboration time. Believe me, BrainPOP has something for everyone and you won’t be disappointed.

Posted in Cool Tools, Creating Accessibility, Google Workspace for Education, Teacher Feature

Teacher Feature – Kat McAndrews and her Digital Portfolios

Kat McAndrews, a sixth-grade science teacher at Berry Intermediate, has decided to throw caution to the wind and jump headfirst into new ways for her students to show themselves as learners and scientists. We had a quick discussion one day about this, and next thing I knew, she had turned her ideas into reality and is using Google Slides and Team Drive with her students as they create digital portfolios to showcase all their learning and growth this year!

I decided that I wanted to see all of this in action and scheduled some time to visit with her and her awesome students. When I first entered her classroom, I could feel the thrum of energy from the kids.

BD3C8FD0-4C19-440D-9BB6-BAEF5C28B09F.JPG

 They were getting ready to head outside with their soil kits, and even though it was close to 92 degrees, the students were excited to be out in the field. This was day two of their soil quadrant work, and the students were using their interactive science notebooks to record data on the experiments they were conducting. As they were working, Kat walked amongst them, snapping photos and discussing their procedures and results. As the class drew to an end, she began uploading the images to Team Drive so that the students would be able to access them tomorrow in class when they continued working with their digital portfolios.

769B04A7-2045-4A49-B45D-646037E8F352.JPG

C2C0820C-A293-4837-A56F-BB44C50AEB0D.JPGE90DE4AB-F1A6-4A44-80F6-C9A3B7942989.JPG

FD18EC31-B0CC-44B7-8441-EF0EA1BF3126.JPG

B00AB75E-838B-4D0B-B222-77D655AF4C5A.JPG

I made a second visit later in the day to see a class that was a little further along with this project. These students had finished their lab work and were now ready to show what they knew by creating short skits or presentations about the topic. I watched a newscast, a rap, a scientific demonstration of techniques used, and some very awkward kids hiding behind posters! Kat recorded all of these presentations with her trusty iPhone, and just like she did with the images, uploaded them to the corresponding Team Drives for her students to access.

The next time I was in the room, it was an inside work day (Thank goodness, as the heat was slowly killing me). I circulated around to get a good look at what the students were creating. Since their photos were already in Team Drive, students were able to quickly get to work grabbing images to add to their Slides presentation. Kat gave them free reign to showcase themselves as learners and to share their data. She simply asked them to not select a bold background image because that might interfere with their data and their images.

436270E0-5322-4911-9C42-69CE89D2148F.JPG

173CEB42-F11B-42DE-8283-5D5EC5E33333.JPG528B8554-E8E3-409E-8761-B7B54F8D64ED.JPG

The students now have a digital portfolio that showcases who they are as learners and sciAACDC236-062B-4BE1-BCF6-0F895348C06F.JPGentists. Not only can they show their teacher this, they can also share this with family members or other students. Using Slides makes this uniquely portable, and this sixth-grade portfolio can now follow them through their entire school career and even beyond if they decide to make a copy of their school Drive when they go out into the big, exciting world! I am so pleased that Kat has taken this sort of risk and figured out all the pieces necessary to make this a success. She has done a great job troubleshooting any issues that have come up, and even though this was her first time using some of this tech, she has created a vibrant learning community with her students.

Their portfolios are a work in progress that they will continue to add to all year. Here are a few examples (I have removed some Slides to protect privacy)


Here are the nuts and bolts of how Kat accomplishes these student created and designed portfolios.

  1. Using the new Team Drive feature in Google Drive, Kat created a Team Drive for each of her science classes. She then added her students to the corresponding Team Drive
  2. Each student created their own Slides presentation that will be used as a working portfolio for the school year and shared it with Kat.
  3. While students are working as scientists, she takes pictures of them in the field. She also records them giving their group presentations. These presentations are designed by the students to show what they have learned in a new and creative way.
  4. Using the Drive app on her phone, she then uploads the pictures and videos to the Team Drive so that students can then add them to their own portfolios.

Using technology in her classroom has opened the door for Kat’s students to create and show their learning all while putting their personal stamp on their work. She could have done something similar with just paper and pencil, but being able to quickly add images, videos, and creative elements to a digital portfolio that can be shared on a global platform brought this activity to a higher level. It isn’t about replacing a paper portfolio with a digital one, it is about the ability of the students to create and share with other people inside and outside of the four walls of their classroom. Good edtech doesn’t replace an activity, it allows you to do something that would be impossible without the tech. This is a perfect example of doing something Kat couldn’t have done before!

I know many of you are doing equally awesome things in your classroom. I would love to hear about what you are doing and spread the good word. Please contact me if you want to share your awesomeness with the world!