Posted in Cool Tools, Google Keep, Google Workspace for Education

Google Keep – You Didn’t Know You Needed It, But You Do – Part One: Teacher

Google Keep is one of my favorite GSuite tools, but it is a tool that most people don’t seem to know about. Keep has been hanging around for some time and it has features that make it indispensable for you and your students.

At the most basic level, Google Keep is a note-taking app. Users create sticky notes of information that can be color-coded and tagged for easy grouping. Notes can be pinned to the top, created as a checklist, and include links, images, and even drawings. Keep also has a search function that allows the user to quickly locate notes in the notepad.

Here is a quick look at my Google Keep:

Snapshot of Keep - Pinned
Pinned Posts on Keep
Keep - Other
The Finest Google Keep In All The Land

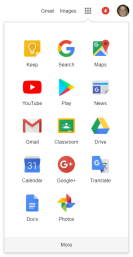
App FinderTo access Google Keep, simply go to keep.google.com or use your app finder to pull it up. If this is the first time you are accessing Google Keep, you might need to click on the “More” option to find it. Remember, these icons can be dragged and dropped so that you can easily reorganize them to meet your needs. However, Google Keep doesn’t only live on the web since you can find the Google Keep app for both Android and Apple platforms in the App Store or the Google Play store. Keep synchronizes across all of your devices, so if you add a note on your phone, you will immediately see the note across platforms.

Virtual Sticky Notes of Awesomeness:

Google Keep allows you to create a wide variety of sticky notes for all of your needs:

  • Regular old notes with a headline and a body – but in color!
  • Checklists – I love “to-do” lists and Keep makes all of my organizational dreams come true!
  • Image-based – take a picture or use an already saved image and then write your ideas all over it!
  • Free-hand drawing – No image to match your awesomeness? Draw your own!
  • Audio – (Only found in the Android or Apple app) – Have a lot to say but your fingers are too tired to type? Speak your thoughts right into Keep. The best part? It transcribes your speech to text and saves the original audio file.
  • Location-based reminders – Walk into the door at school and get an automatic reminder to do whatever that thing was that you couldn’t remember to do last time.
  • Share the love – All Keep notes can be shared with collaborators. Every collaborator has the right to view and edit your note of awesomeness.

Applications of Awesomeness:

The question you are probably asking is, “why do I need this tool?” The answer to that is very simple; Google Keep has become fully integrated with G-Suite for Edu applications. That means, aside from creating the most spectacular sticky notes ever, you can begin using them for teaching and learning. Your Google Keep notepad will now show up as a tool in Docs, Drawings, and Slides. Anything that you have created or saved in Keep is now an item that you can drag and drop into your current project. Look at the new level of productivity you are bringing to your work!

Open Keep
Find the Keep notepad under the “Tools’ menu
Adding from Keep
Adding content from Keep

This process includes any images that you might have saved to Keep, even if they are hand-drawn. My artistic abilities are not the best, but I can now add the most poorly drawn heart into anything I want!

Adding Images
Adding Content to Slides

Practical Applications for Use:

  • Feedback/Comments – if you find you are giving the same feedback on a consistent basis, write it in Keep so that you can drag and drop it into student work.
  • Store/share links you use frequently but don’t necessarily want to bookmark.
  • Take a snapshot of any board work or diagrams you drew throughout your lesson so that you have them for later (not all of us have interactive whiteboards, you know).
  • Teacher collaboration – instead of dumping all of your content into a shared Doc, create shared Keep notes. These are really easy to organize and place into a Doc once you are ready to start working on the final product
  • Teacher created materials like diagrams, drawings or playlists can be created in Keep and then inserted into multiple Docs, Slides or Drawings.
  • Research and resource gathering – I used to use Diigo to capture and collect resources or curate content that I needed for teaching and while I still find it to be a valuable tool, Keep allows me to capture resources and then bring them right into a Google Doc or Slide (with the appropriate citations, of course).
  • Save to Keep extension – Found something on the web that you want to save for later? Use the Save to Keep extension to not only save the resource but annotate and tag it for later use.
Save to Keep
Save to Keep Extension

Google Keep is an excellent tool to add to your edtech arsenal and will help to streamline your life in many ways. This article focuses explicitly on teacher use of Keep, but the applications for student use are numerous. My next blog post will focus on how students can use Keep, so stay tuned!


Posted in Creating Accessibility

Meaningful Onboarding When Using Tech in the Classroom

I started my teaching career back in the dark ages of 1996 and stayed in the classroom until the end of 2007 when I moved into the library/media center. Those first few days of school were always a wonderful flurry of activity where I would introduce myself, meet the kids, but most importantly, give them glimpses of how things in the classroom needed to work in order to create a positive experience for everybody. You know, things like: where assignments needed to be turned in; where to find supplies; where to find additional copies of class materials; how to keep track of individual progress; classroom roles and responsibilities; how our classroom economy would work; how to be a good classroom citizen; and most crucially, how to be excused to go to the bathroom! By the time we hit the middle of the first quarter, my classroom would run like a well-oiled machine and students were largely independent and able to function in the environment we had created together. Whenever a new student arrived, the kids would demonstrate their knowledge by teaching the new student the ropes.

Our classrooms of today have added a technology element that has big impacts on our classroom communities. Living in a technology-rich classroom has changed the landscape, but have we given any thought to how to introduce our students to these tools and how to best use them to keep our classes running like that well-oiled machine? When you walk into any classroom these days, the automatic assumption usually made is that every single child in that room has more tech knowledge and skills than the average adult. Teachers believe that all we need to do is hand our students a device and they are off and running. I suppose that is true if we are asking the students to use Snapchat, post on Instagram or create a playlist on Spotify. However, if we want them to use their devices for teaching and learning, there is a good chance that they need to be onboarded into our classroom’s digital environment.

Think about your experience as an educator. When you adopted an LMS like Schoology or Canvas or began using a content delivery system like Google Classroom, you probably (hopefully) received some sort of professional development to help get you started. Even if it wasn’t anything official from your school or district, you most likely watched the introductory training videos or read the quick start guide offered by the programs themselves. Now, look back to the first time you had your students work inside one of these systems. Did you talk to them about what to expect when they are working within the system? Did you walk them through the steps necessary to log in? Did you show them how to access the content you are sharing? Turn in their assignments? Add it as a favorite to their browser? Did you have any discussions about digital citizenship and your expectations for how each student should represent themselves in a digital environment? If you haven’t had these discussions with the students, I am not sure they know how to live in the digital space you are using. Just like you needed a little guidance to get started, so do your students. I am not advocating for long drawn out sessions of direct training, but the first few times that you have assignments in Classroom or in your LMS, walk students through access, creation and turn-in options so that they know how to effectively interact with the environment. When you see students writing “Heyyyyyyyyyyyyyyyyyy everybody, I am so crazy!” on your Classroom stream, think about how you can discuss appropriate sharing in a digital space.

My district is a Google district and I spend a lot of time in different classrooms with students. The funny thing about our students these days is that they are able to figure out how to use just about any flashy tool that they stumble across, but if I ask them to create a Slide or Doc, there is a pause and students scatter to create in a weird variety of ways. I have watched students Google the words ‘Slides’ or ‘Docs’ and then randomly click on whichever search result is at the top of the list, even if it isn’t a Google product. When we are working on something on one day and I want them to access it on another day, they aren’t entirely sure where to find it. It has become apparent to me that I need to onboard these students by quickly showing them how to access their Google apps via the app finder (we call it the ‘waffle’), how to navigate to Google Drive, how to create folders in Drive and how to create within the folders for easy access at a later date. These are not all stand-alone lessons that take a bulk of the class time. Rather, these skills are what I show them when I model the set-up and routines expected in my class. They are not limited in their choice of creation tool, but at the very least, I know that they know how to organize their creations and share them with me.

When you create a digital environment for your students to live in, onboard them by defining:

  1. How to access the environment:
    1. How do they login? Username and password?
    2. Can they access it from home?
  2. Digital citizenship expectations:
    1. Are they free to comment and express themselves in the environment?
    2. What are expectations for interacting with peers?
    3. When digital media is created, how are images found and used and how are citations displayed?
    4. What external sites are ok for use in the digital environment?
  3. Workflow:
    1. How do students access assignments?
    2. How do students turn in assignments (share vs dropbox vs “turn in” features)
    3. Will your assignments be posted on a calendar or should students look in another location?
    4. If you are using Clasroom, are students expected to mark their assignments “done” even if they have turned in a physical copy instead of a digital copy?
    5. When you are collaborating and giving feedback on student work before it reaches the final form, how will that workflow be managed?
  4. Communication:
    1. Let the students (and parents) know how you will communicate with them digitally. Will you be using the announcement feature in Classroom or Schoology? Will you use an app like Remind?
    2. Let them know how feedback will be delivered to them for different assignments. Should they look in the private comments in Classroom, comments within a Google Doc or Slide, video links, handwritten on sticky notes? If they know what they are looking for, it will be easier for them to interact with your feedback.
    3. If you give grades, where will the students see the grades? On the assignment? In the Schoology grade book? On ProgressBook? Written on the top of a paper?

In my mind, these are the essentials your students need to know in order to be properly onboarded into your digital learning space. Just like you take some time at the beginning of the year to discuss how to leave the room to go to the bathroom and that your students should call you Queen of Awesomeness (just me?!?), you should spend some time making sure they are comfortable and prepared to learn in both a physical and digital space.

How do you onboard your students? What essentials did I miss? Feel free to share your ideas in the comments!


Posted in Blended Learning, Cool Tools

Formative = EdTech Tool of Awesomeness

As educators, we know (hopefully we know, please say that we know) that we should be using formative assessments to drive the learning in our classes. Formative assessments are assessments for learning, providing the teacher with important information on how to adjust the learning experiences in the classroom in order to meet the learners where they are. When formative assessments are used on a regular basis the teacher discovers where they should provide instruction and/or alternative pathways to ensure that students are mastering the learning targets and objectives throughout the course of study. This is in direct contrast to waiting until the end of a unit and summatively assessing students only to realize that they were not truly learning or applying content. When formative assessments are given, you know right away if a student has not gained mastery of the skill and can then provide additional or alternative opportunities to learn. Using formative assessments to create a responsive teaching and learning environment is something that every teacher should strive to do. Some popular ways to formatively assess include exit slips, self-reflection opportunities, use of Google Forms, Kahoots, Quizizz or other game platforms. The problem with these formative types are that you still have to wait until the student turns in their work to see where they are in their understanding of the concept. (Click here for more on formative assessments).

Wouldn’t it be great if you had a way to see how students were performing on a learning task as they were working? Guess what?!?! When you use an amazing tool called Formative, you can!

Formative is an online program that bills itself as a classroom response builder designed to track and accelerate student growth. Using a host of Formative tools, teachers can create media-rich assignments or assessments that allow students to respond through traditional means like multiple choice, short/long answer and true/false, or by showing what they know using drawing and creation tools. What sets Formative apart from many of its counterparts is that the teacher can see what the students are doing in real time and can give immediate feedback digitally through Formative or in person as the student is working in the classroom. You no longer have to wait until the lesson or skill practice has ended to give your students valuable and meaningful feedback. As students interact with the content, you can immediately see where struggles and successes are happening and create new and responsive learning opportunities for them. Here is a brief video that gives a nice overview of Formative in action.

Formative is free for teachers and students to use. A free account with Formative is pretty robust and offers question and content creation tools that make any edtech fan giggle with delight. A Formative can include images, videos, text, diagrams, and even allows for a direct embed from other third-party tech tools like Flipgrid, Padlet and Edpuzzle. There is a feature that allows the creator to upload a PDF or Doc and have the students write right on it. (This is limited to 20 pages per month on the free account.) Sharing a Formative is a cinch with the Google Classroom integration, and the student response view is a thing of beauty!

The whole reason to use Formative is because of how you can interact with students as they are working, but the build tools are easy to use and extremely accessible to teachers. When creating a Formative, a teacher can choose to make an assignment, benchmark, classwork, do now/warm-up or exit slip. Question options for the free account include multiple choice, multiple selection, short answer, essay, true or false, and my favorite, show your work. When creating the Formative, the teacher has the ability to indicate correct answers and assign point values if the activity is being completed for a grade. Watch this short video to see the different question and response types.

Giving immediate feedback to students through the dashboard is an easy task. Once the assignment has gone live, you can see and interact with student work. If you see a student making an error or struggling with a task, you can immediately intervene and provide feedback digitally or pull the student and work with them one-on-one before they even have a chance to leave your classroom.

live-responses-grade

Any feedback that you give to the student shows up immediately on their screen! Instead of finding your carefully created feedback tossed carelessly in the garbage (or left on the floor), you know that students will see your amazing words of wisdom right there on their screen.

Formative also has a nice tracking feature. You can see how students do on individual activities and track their work over multiple assignments. There is also a standards option where you can link standards to specific questions. Did the student just get lucky and answer something correctly, or do they actually have a handle on the material? Now you can tell by tracking the trending data over time.

track

If this post has sparked your interest and you want to learn more, mosey on over to www.goformative.com. They recently launched a new community page where educators just like you can collaborate, share, learn and grow. If you are a Lebanon City Schools employee and would like some coaching time with me, just shoot me an email and we can get started. As you can see by my amazing video, I am a Formative expert… 😉

Caveat: As you try new tools in your classroom, remember, it is crucial that you include your stakeholders and onboard your students. A quick letter or email home to parents to let them know what tool you are using and why is a great way to head off any concerns. Don’t forget that many of our families learned in traditional school settings and view programs like Formative and EdPuzzle as a negative because they mistakenly believe that you are not teaching and are just having their kids watch videos or work on computers all day. Be sure to explain that you are using these tools in order to give their children a more personalized and targeted learning experience. Students also need to know the purpose of a new tool, as well as an overview of how to actually use it!

Posted in Google Classroom, Google Workspace for Education, Quick Tech Tips

Academic Integrity in the world of Google

In this day and age of G-Suite for Edu, our ability to collaborate and share on a world stage has opened amazing doors to our students. Unfortunately, it has also opened an easy door for students to walk through when it comes to cheating. Google has made it so easy to share that students not willing to do the work have figured out how to take full advantage of share, copy and paste features. If only they would put as much time into their work as they do into figuring out how to cheat!

Some educators have decided that the threat of academic dishonesty is so great that they have will forgo using any Google tools in their classroom. This is an absolute shame since students are really missing out on a large number of collaboration and creation opportunities. Rather than closing the door, there are ways to keep that door open while maintaining academic integrity standards.

One of the first ways to prevent copy and paste style cheating is to create assignments and projects that allow for unique and creative responses from your students. Of course, this isn’t always a reasonable expectation for every assignment and there are lots of times when you will be having your students answer questions in a digital environment. And, as you know, that is where the cheating comes in.

Revision History

Fortunately, Google has provided you with the way to track your little cheater friends and catch them red-handed! Enter Revision History! When a Google Doc, Slide or Sheet is created, all edits, additions, and changes are tracked. These edits are accessible to any editor. When a student shares their work with you, you become an editor and should be able to track the document’s revision history. Every time something is typed, every time an edit is made, every time something is dumped into the document, you can track it! As an added bonus, if students are working on a group project, you can see which student worked on each part of the project. It is like you just stumbled onto some sort of magical powers!

To see revision history:

  1. Open the Doc, Slide or Sheet
  2. Click on the “File”
  3. Mouse down to “Version History”
  4. Click on “See Version History”

Need to see it in action? Watch this video:

If a student has a lot of edits, you can feel pretty comfortable that they have done the work for themselves. If they have only one edit, this is a pretty good indicator that the student has copied and pasted the bulk of the material.

Google Doc with one edit showing
There is evidence of only 1 edit on this entire document
Google Doc with 35 Edits in the history
This student has 35 edits on her document

Be warned, there are ways for your students to work around this as well. Making a copy of something will automatically delete any revision history, but a lack of edits on an assignment is a pretty clear indicator that something fishy is going on.

To be able to see the revision history, you must be an editor (or collaborator) on the document. The easiest way to accomplish this is to assign the work via Google Classroom. Since you are the owner of the Classroom, you are automatically made an editor on any of the work a student creates and turns in through the Classroom engine. Here is a great video by Eric Curts from controlaltachieve.com.

Another creative educator discovered a second way to check for academic integrity on materials students have turned in to you via Google Drive or Classroom. I can’t believe I never thought about this before. Thanks to Dennis Neufeld @mrdennisneufeld for this creative suggestion!

If we lived in a perfect world, none of this would be necessary. But, we know that kids will be kids and many will go to Herculean lengths to avoid working on assignments. If we let our students know that we have all the powers of “The Great and Powerful Oz” and can catch them in their dishonesty, maybe they will be less likely to mosey down that yellow brick road of dishonesty. Have open and honest conversations with your students, ask them what forces them to cheat, and explain that there are easy ways to catch them. Maybe, just maybe, they will learn some valuable lessons while they are in school!